(This guide is based on Python 3.9 version and Windows PC)
※ Before we begin, please check your python version in your local PC. you can check your python version by this command
PS C:\Users> pip --version
pip 22.0.4 from C:\Program Files\WindowsApps\PythonSoftwareFoundation.Python.3.9_3.9.3568.0_x64__qbz5n2kfra8p0\lib\site-packages\pip (python 3.9)
1. First, you need to make proper directory to download external library.
The location should be like this format
/your_package_name/python/
2. After you make directory, move to that directory by shell program
cd /your_package_name/python/
3. And now you are ready to download the external library in your local computer
pip install [Package name] -t [your_package_name/python/] --no-user
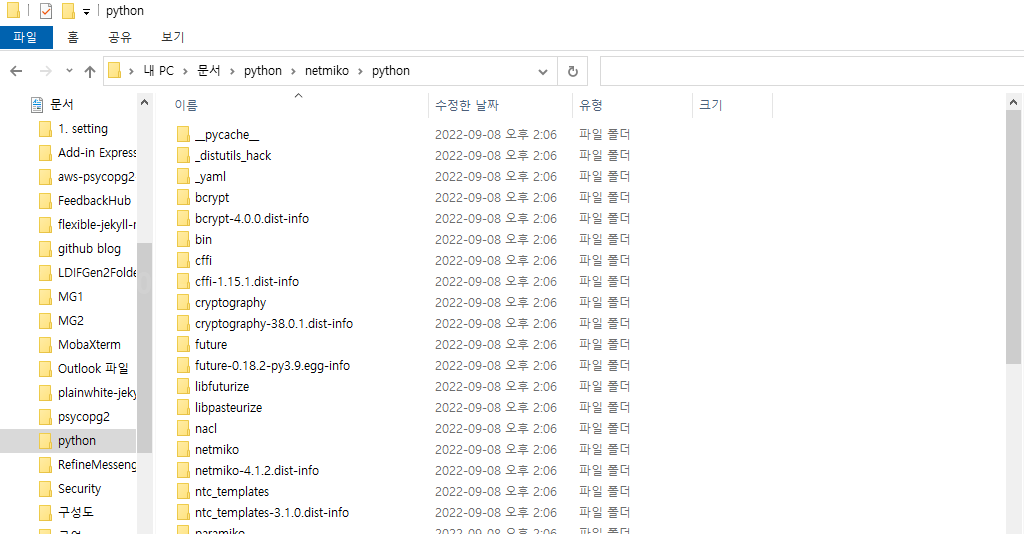
4. Once you install the package, your package directory should be look like this
5. Move out to [your_package_name/path]
cd ../..
6. And then, you should zip the directory as its package name.
(In this example, I used PowerShell script. But if you have another Zip-File maker (ex. Winzip), you can use it )
 ##This line works only in PowerShell!

  Compress-Archive -Path ./[your_package_name] ./[your_package_name].zip
7. Now you finished to created package file to upload! Move on to AWS Lambda Console
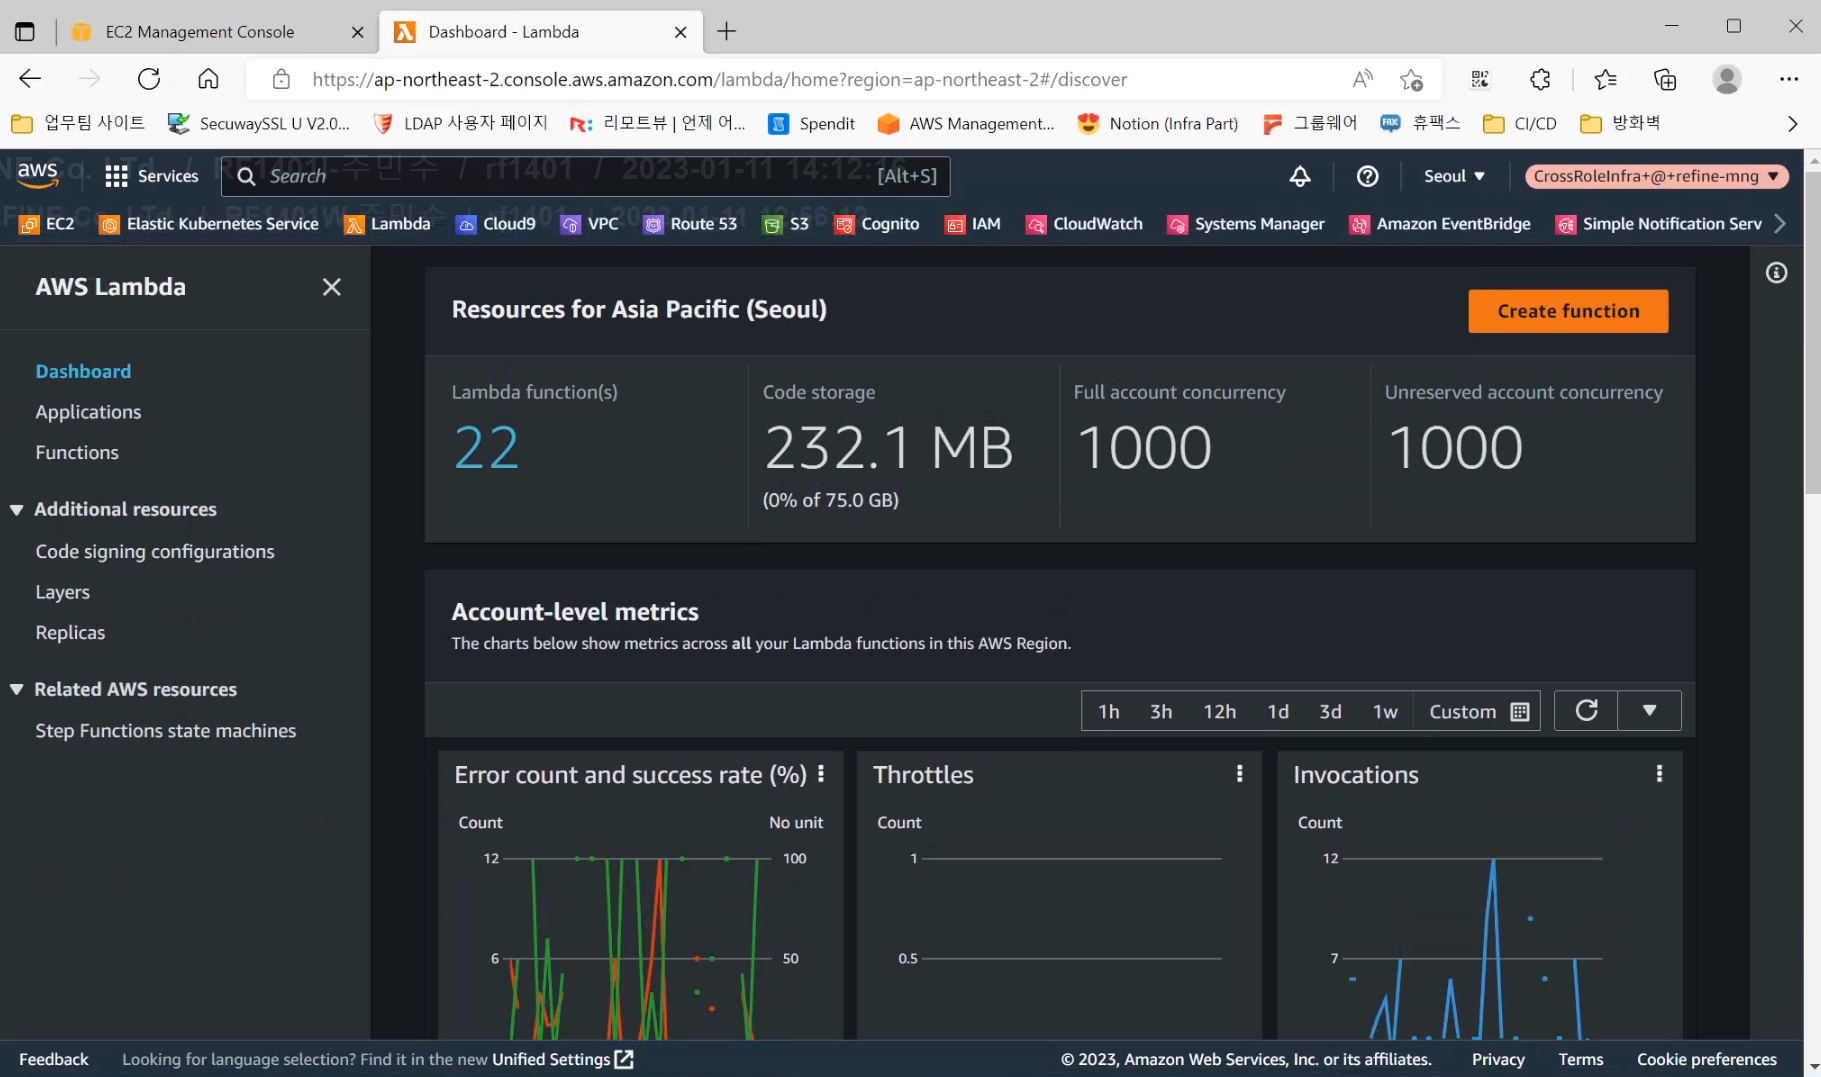
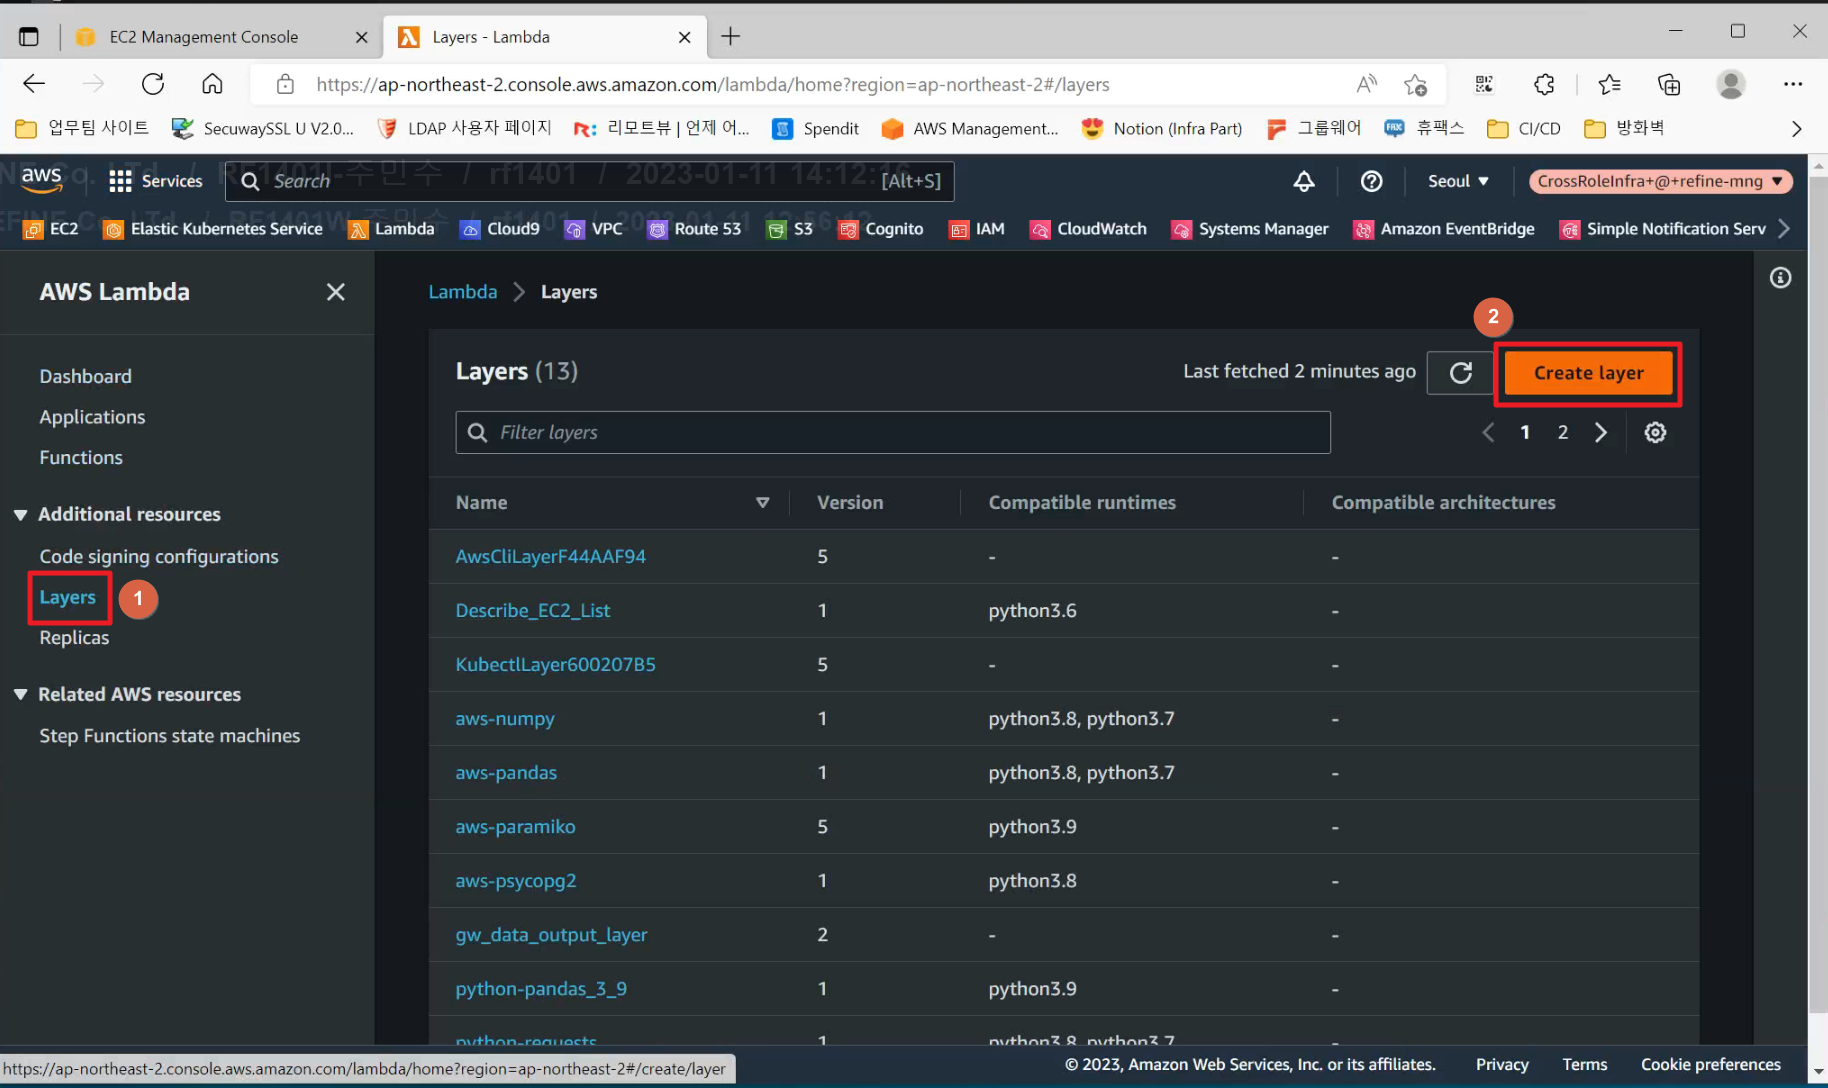
8. Go to [Additional Layers] - [Layers] and then press [Create Layer] Button on Console
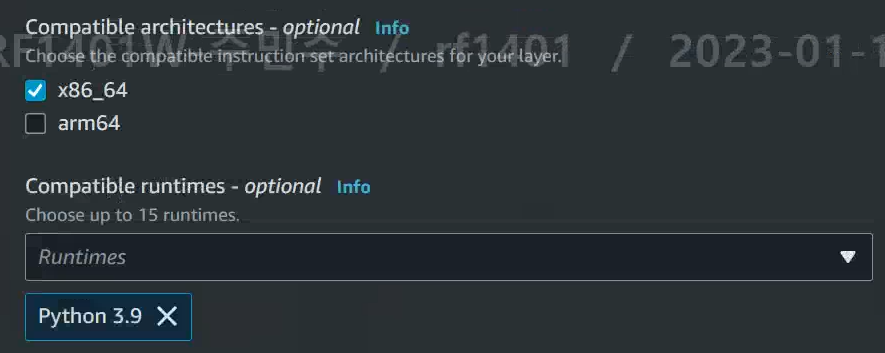
9. Fill out the Name and Description then select [Upload a .zip file] among radio button. After that press [Upload] button.
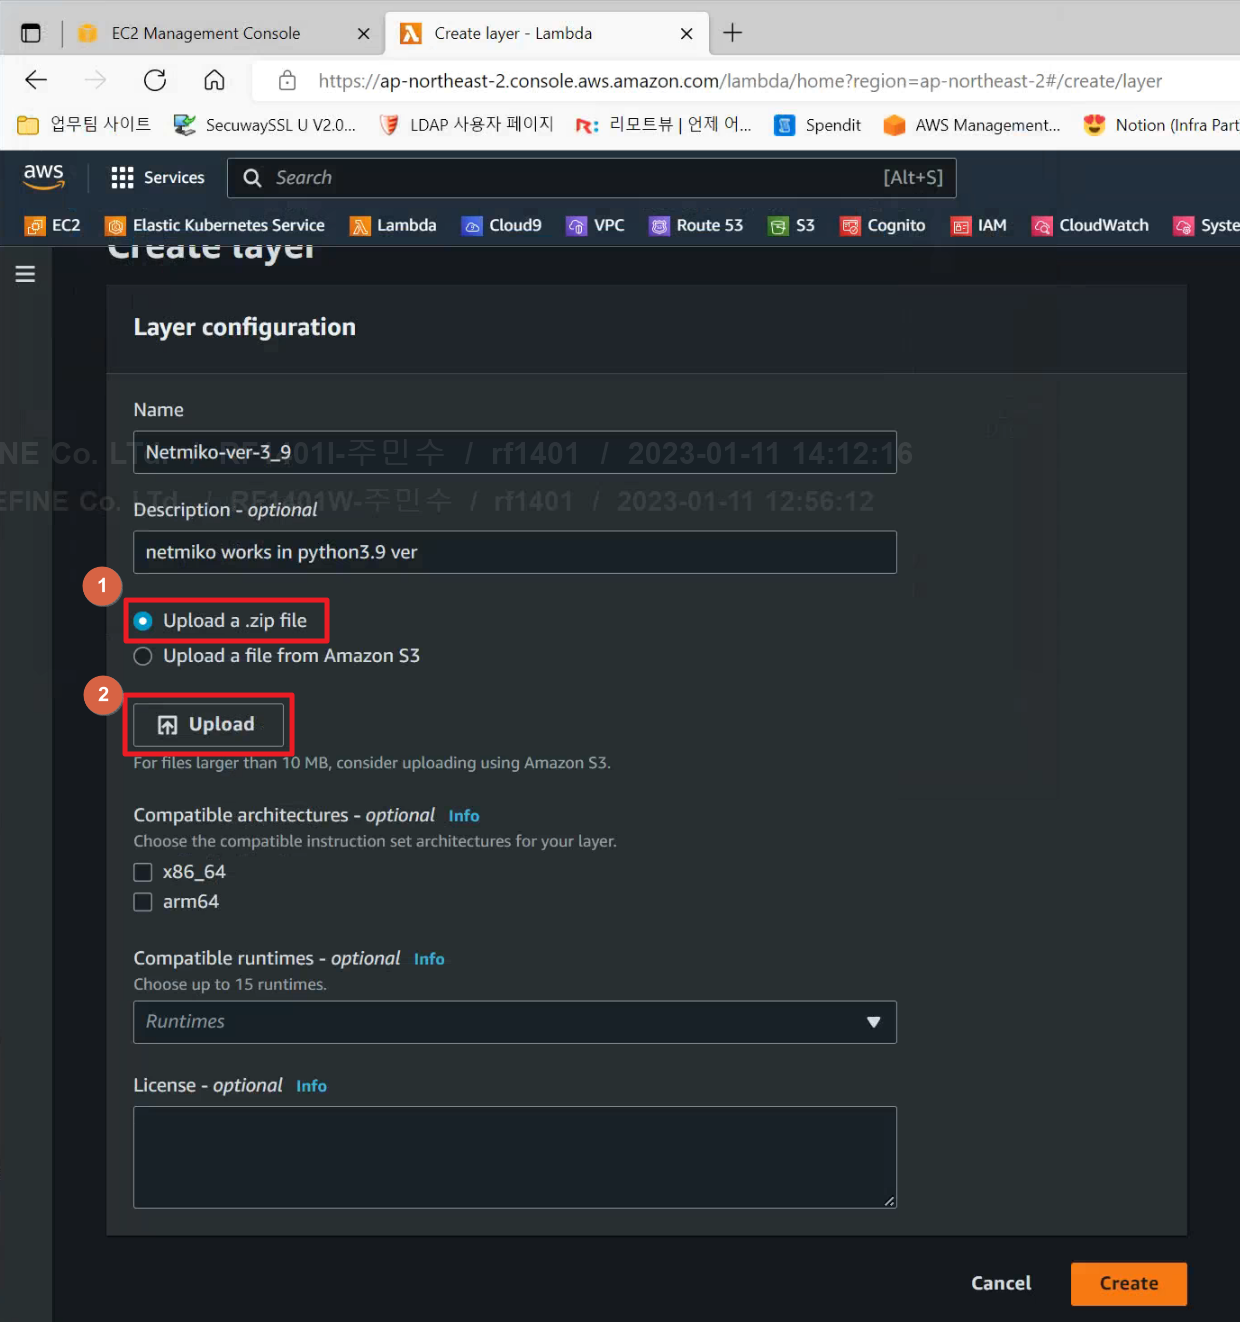
You can also add compartible runtimes and license as options
※ Pacakge file must be below 10MB. If its not, you should upload by S3
10. And now you succesfully uploaded python package into Lambda layer
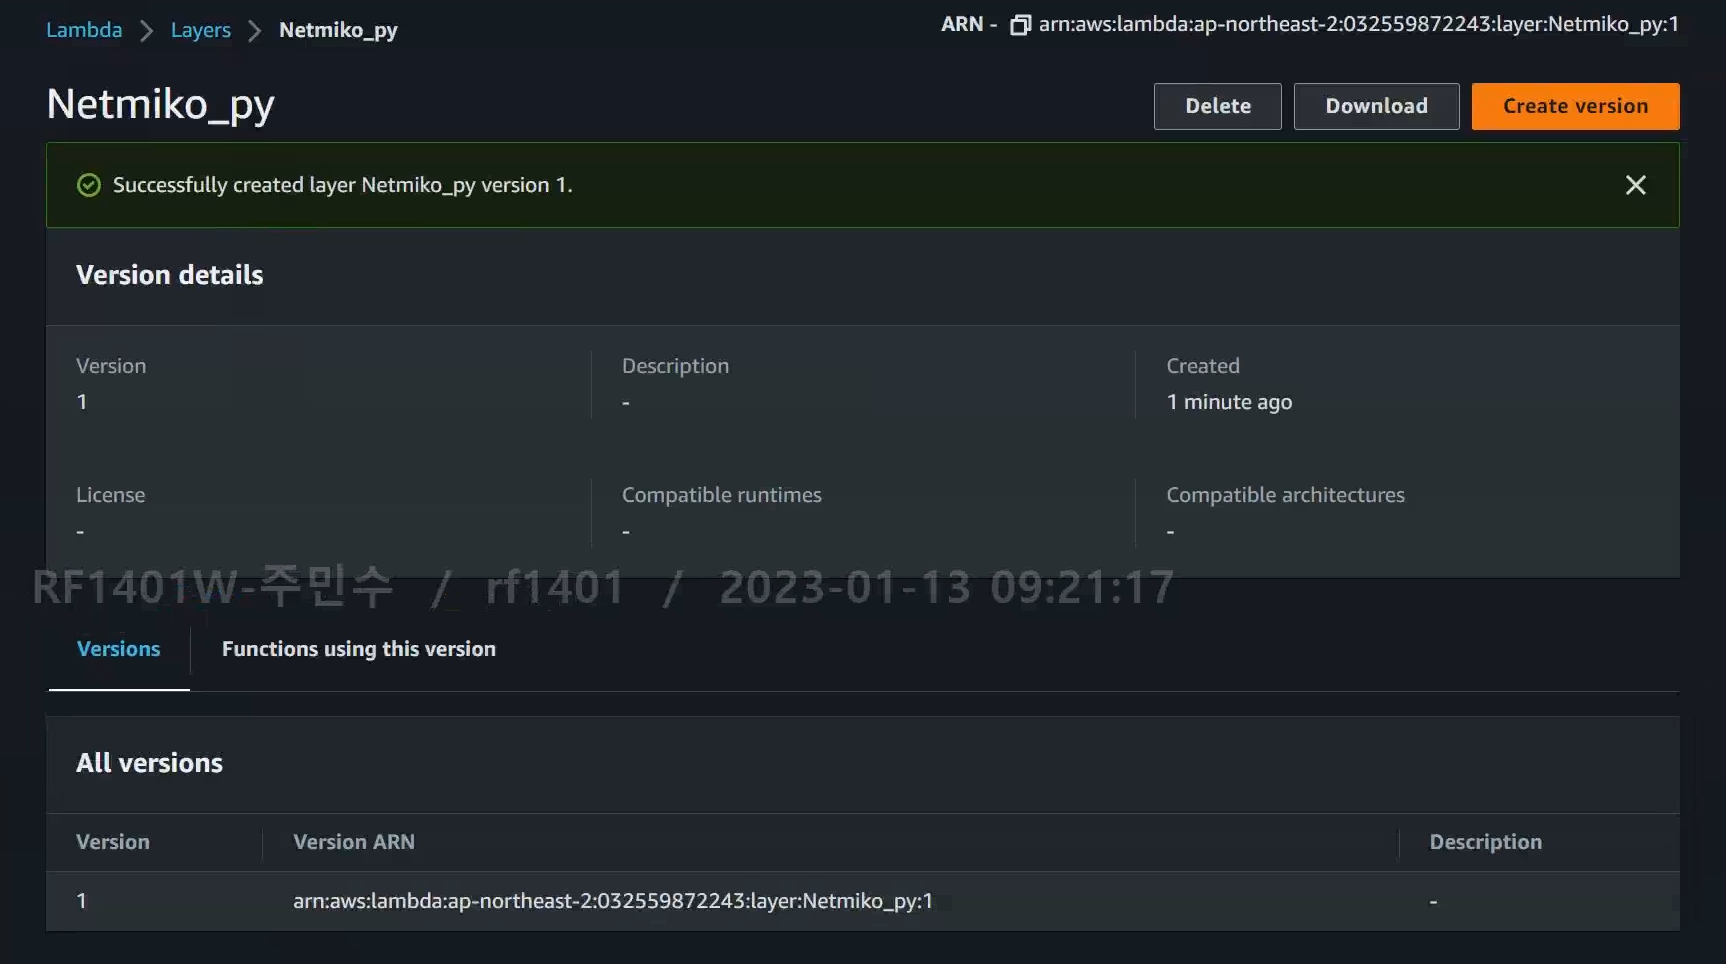
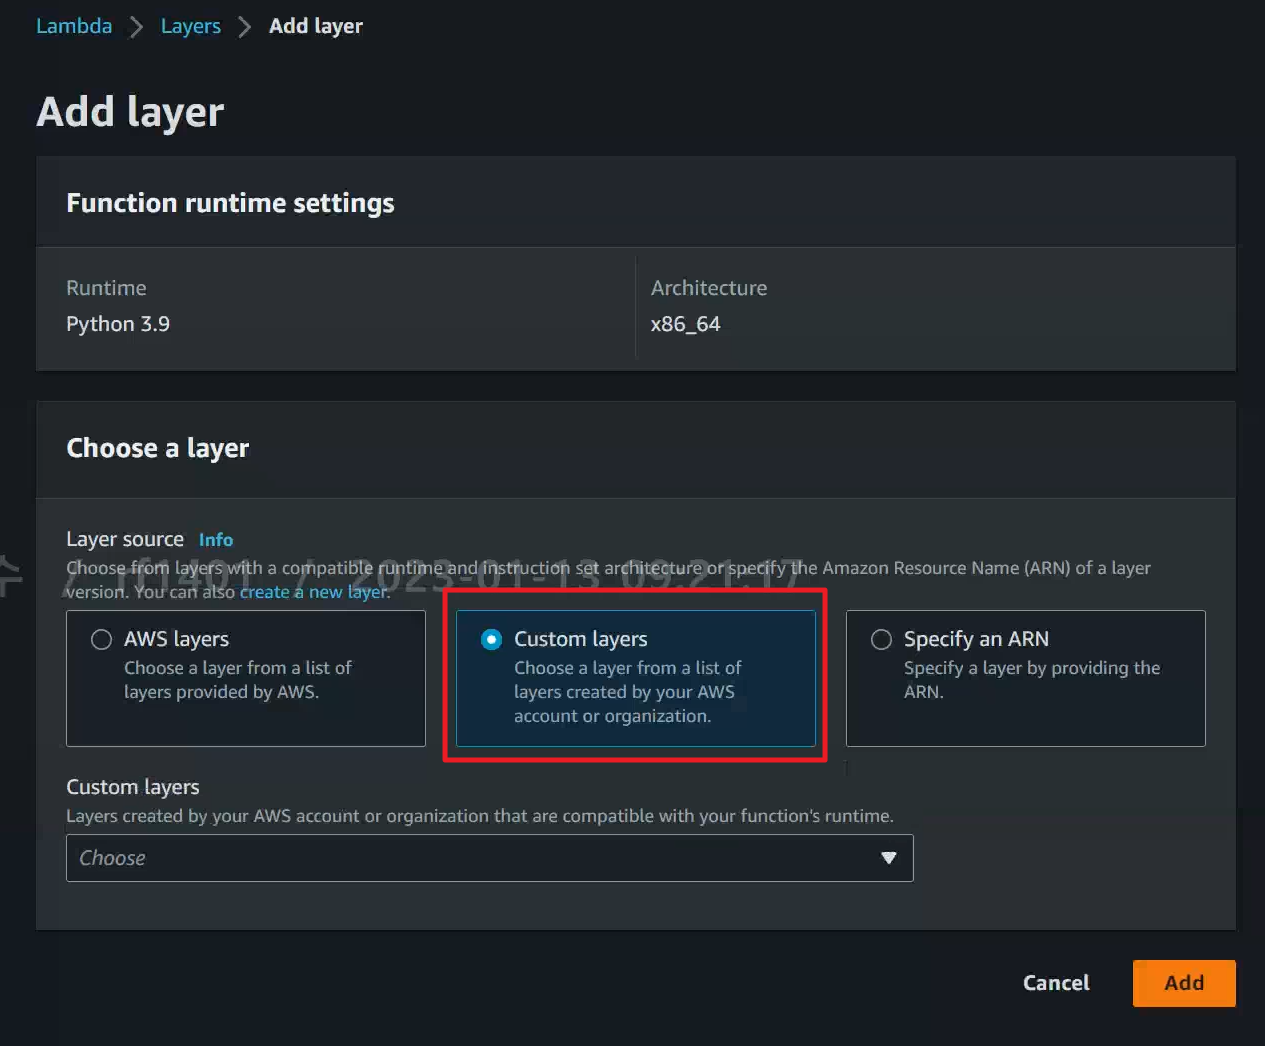
11. You can add your custom layer when you editing Lambda function like this

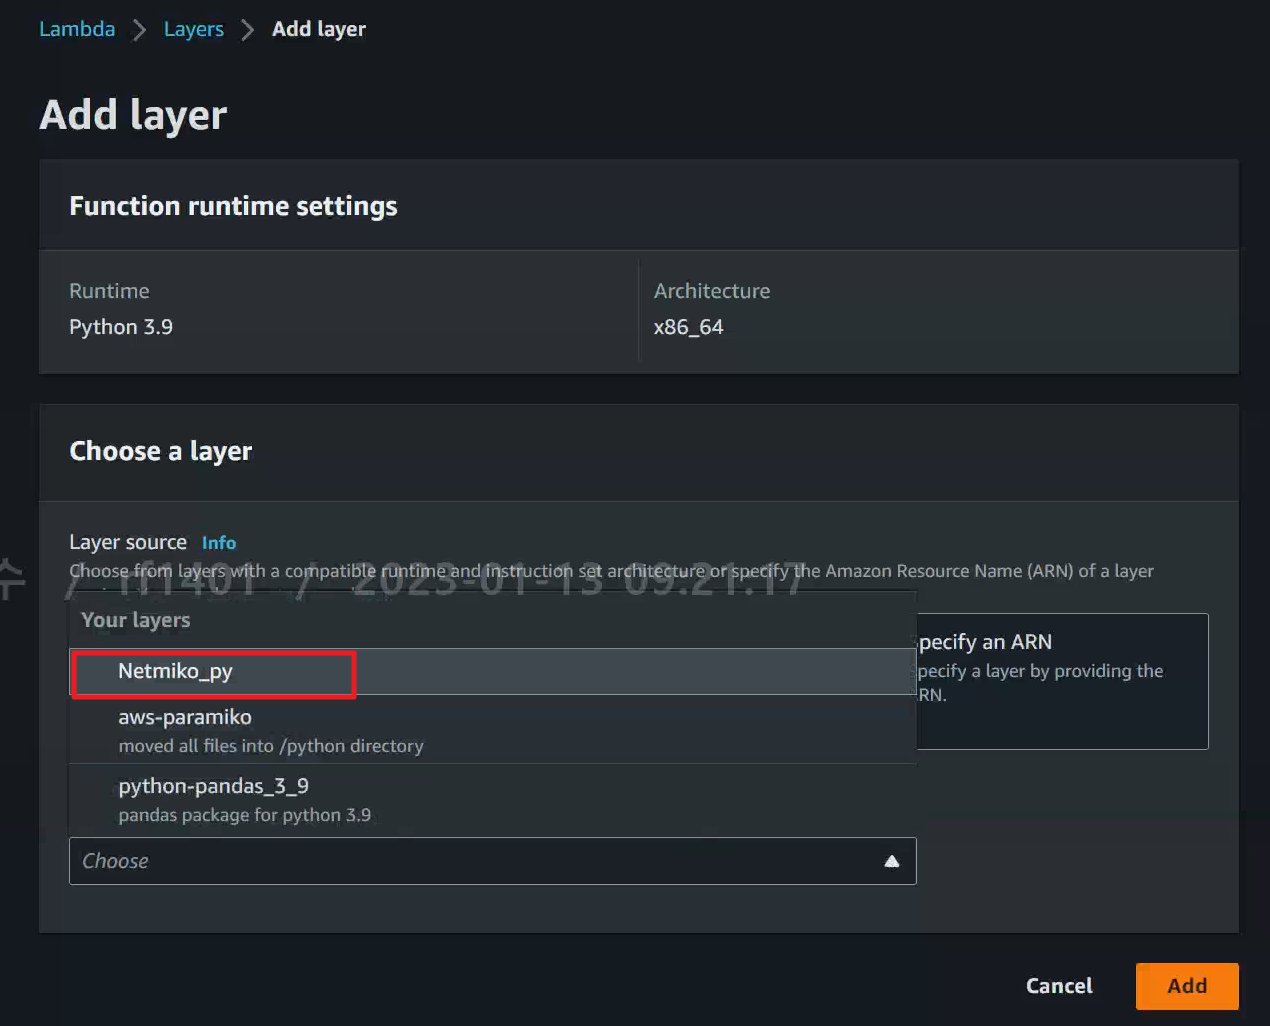
- If you can’t find your layer when you about to add, return to Lambda Layer page and add proper [Compartible architectures] and [Comaprtible runtimes].
